 |
| I'm going to show you how to make the perfect baby back ribs. |
I'm going to share my recipe for the perfect Baby Back ribs. This is going to be a two part picture instruction series, the second, giving a full meal recipe of my Baby Back Ribs. You'll have to wait for part two to get the recipe for the sides of Summer Maple Squash, and Angus Mac-n-Cheese. Yum. I have to tell you, the key to perfect ribs is cooking them LOW and SLOW. Sort of why I chose to cook them on my vacation, I'm not in a hurry. I have no where to go. So let's get started.
Step One: Marinate the Night Before.
For this project, I cut the ribs into small racks and marinated them overnight in one of those aluminum turkey pans you get in the grocery store. I find they are long and low and can fit a bunch of baby backs in your fridge for overnight marination. Be careful not to puncture it or you will have a bloody mess to say the least. For this recipe, I marinated with a blend of:
- Dry Rub Seasoning or throw your own dry spice together. (Make sure to include Season Salt, Parsley, Garlic Salt, Paprika, Basil)
- Thin white onion slices
- Add Crushed Garlic to Suit
Step Two: The Next Day: It's Cooking Time. Get in the Lo-N-Slow Cooking Zone.
Cooking the perfect ribs takes time, so you should get yourself into the mood where you have all the time in the world.
Step Three: Choosing the Right Grill and Smoking Wood
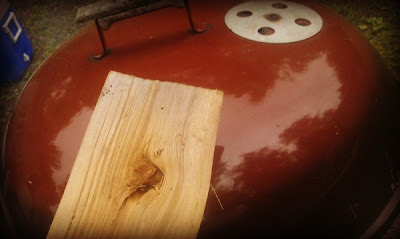
For this project I am using a vintage Weber full size vintage grill. It's something my wife's family cooked on when she was a child. I think it's circa 1977. Whatever the case, it's in great shape even though it's been sitting outside all these years. For this I am using planked hickory wood. It has been split and dried out. I should add that I spritzed it down with apple juice repeatedly until the juice soaked into the wood and dried. I also am using some charcoal, but the plank wood will give it a nice flavor. Covered, with hood vent 3/4 open.
Step Four: Get 'em On.
This is what they look like when they first go on. Note I've cut them into six or eight bones, my dry rub is spread out and the onions all over. The plank wood is atop the slow burning charcoal to give a smoke. The key here is that your ribs should cook about five hours. Low and Slow, maybe temping the grill about 225 degrees. Low and slow.
Step Five: Be Patient and Check Often. Flip Occasionally.
You are going to have to have some patience as it will take some time cooking this low and slow to really see things happen. I often temp my grill as this is an older model and I want to make sure I'm at least 225-250 degrees. Don't want any little critters getting in my intestines from undercooked pork ! While these were cooking I fed some ducks, broke out the four wheeler and drank some Natty Boh's.
Step Six: Refurbishing Your Fire. Plank This.
It is important when cooking for such a long time that you have a way to remove the ribs, and stoke up your fire. If you can see, the planks will sometimes smother out the charcoal if not placed properly. In addition, the charcoal itself isn't really designed to last a full five hours, so you will have to stir, stoke and add fresh about half way thorough. Oh yeah, love me some ribs.
Step Seven: The Debate.
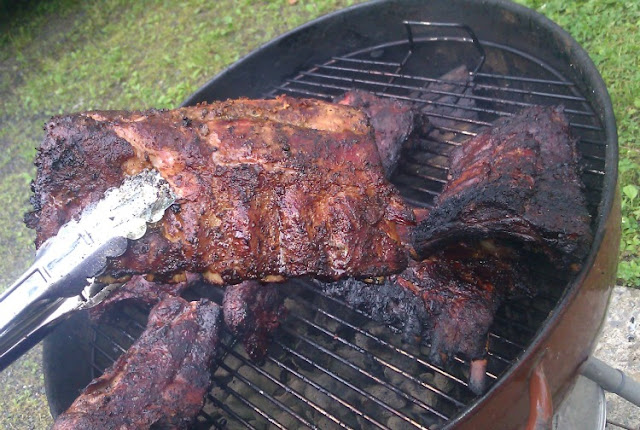
Now at this point the ribs are temping well over 165 degrees. Most people would take 'em off at this point and chow down, and that is just fine if you want to do this. If you'll notice the plank wood has well been burnt up into smithereens, and the charcoal is down to only a low heat.
If you break into them, you will see the meat is fully cooked, there is a bit of a pink smoke ring around the outside (that's flavor folks!)I like to keep them on a bit longer, until when I touch the with my tongs, they want to fall apart. To me ribs should melt in your mouth and you shouldn't have to pull them apart. It has been five hours in. I stoked up the coals and let 'em ride another 20 minutes, but that's just me.
Step Eight: The Lather Up and Throwdown.
Do I really have to explain this? I smother mine in BBQ sauce right before eating, and throw them down with some great smokin' sides. In Part Two I will show you my actual meal and give you my top secret recipe. For now I have to go suck some sauce off my fingers. For this meal, I used Sweet Baby Ray's. Even though I have my own sauce I use for everything, I still love eating everyone else's.
GO TO PART TWO
=====================


